Fried pickle spears have rapidly gained popularity as one of America’s go-to appetizers. It’s hard to resist the satisfying crunch of a golden, warm crust paired with the sharp, juicy zing of a pickle inside. These crispy bites began as a Southern specialty but can now be found on restaurant menus, at sports gatherings, and in homes across the country. Whether you’re hosting friends or just spending a relaxed evening with family, fried pickle spears are always a crowd favorite. They’re ideal for sharing, and everyone enjoys dunking them into their sauce of choice.
By making fried pickle spears at home, you get to enjoy them hot and fresh straight from the fryer—no need for a takeout run or reservation!
What Makes These Fried Pickle Spears Unique
These fried pickle spears set themselves apart with their super crisp exterior. The secret in my family? We double-coat each spear in flavorful batter before frying. This method, passed down from cooking sessions with my mom and grandma, ensures they’re always a top request in our house.
Ingredients and Essential Tools for Fried Pickle Spears
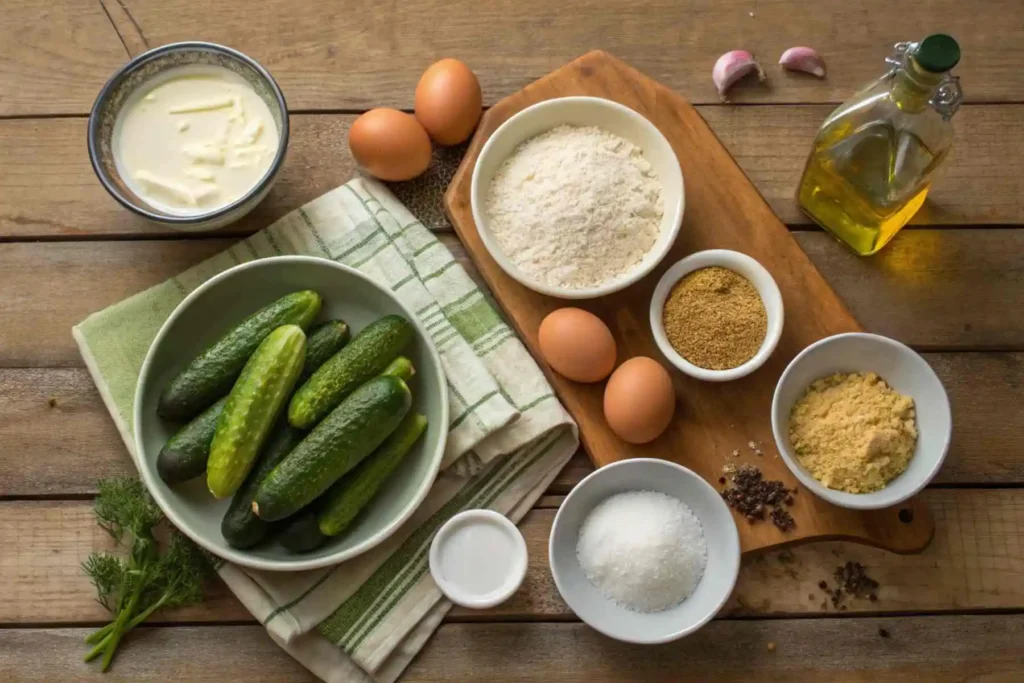
Having everything organized before you start frying makes the process enjoyable and stress-free. Here’s exactly what you’ll need to prepare irresistibly crunchy and flavorful fried pickle spears:
Ingredients:

- 8 dill pickle spears, well-drained and dried
- 1 cup all-purpose flour
- 2 large eggs
- 1 cup buttermilk
- 1 cup cornmeal or panko breadcrumbs
- 1 teaspoon garlic powder
- 1 teaspoon paprika
- ½ teaspoon salt
- ¼ teaspoon black pepper
- 3-4 cups of vegetable oil for frying
Kitchen Tools:
- Heavy skillet or deep fryer
- Tongs
- Slotted spoon or spider strainer
- Paper towels for draining
- Shallow dishes or plates for breading
- Thermometer to check oil temperature
For the boldest, tangiest taste, select high-quality dill pickle spears. Panko produces a crispier texture, while cornmeal brings a classic Southern crunch. Buttermilk helps the coating stick, and using paper towels is key for ensuring everything stays crisp!
Check out this collection for more snack and lunch ideas.
Choosing the Perfect Pickle Spears
When making traditional fried pickle spears, opt for firm dill pickles—they hold their crunch after frying and deliver that juicy interior. Brands like Claussen or Grillo’s are great for extra snap, or you can try quick-pickling your own. Skip bread and butter pickles, as their sweetness won’t give you that classic savory flavor. Craving a kick? Go for spicy or garlic-packed varieties instead.
For more ideas that please a crowd, browse dinner appetizer recipes.
How to Make Crispy Fried Pickle Spears, Step by Step

Prepare to delight everyone with perfectly crispy fried pickle spears. Follow these steps:
1. Prepare the Pickles:
Drain the pickle spears and pat them dry thoroughly. Removing moisture helps the batter adhere better.
2. Arrange Your Breading Station:
- In one bowl, combine the flour, garlic powder, paprika, salt, and black pepper.
- In another bowl, whisk together eggs and buttermilk.
- Place the cornmeal or panko into a third bowl.
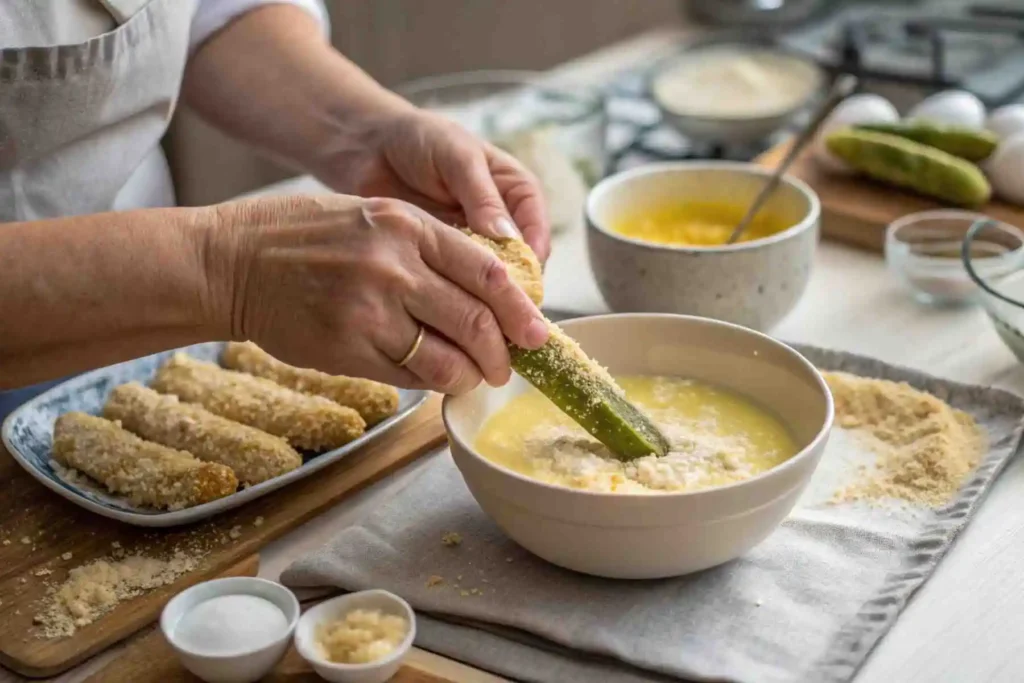
3. Bread the Pickle Spears:
- Dredge each spear in the seasoned flour so every surface is coated.
- Dip into the egg-buttermilk mixture and let any excess drip away.
- Roll in the breadcrumbs or cornmeal, pressing gently to adhere.
- For maximum crunch, repeat the egg and breadcrumb steps again.
4. Heat the Oil:
Fill a large skillet or deep fryer with about 2 inches of oil. Preheat it to 350°F, using a thermometer for accuracy.
5. Fry the Pickle Spears:
Lower a few coated spears at a time into the hot oil, careful not to overcrowd the pan. Cook for 2-4 minutes, flipping once, until they’re crisp and golden.
6. Drain and Enjoy:
Remove the pickles with tongs or a slotted spoon and set them on paper towels. Allow them to cool for a minute before serving with your choice of dip.
Looking for more party-ready ideas? Explore some fun skewered appetizer options.
Expert Tips for Ultra-Crispy Fried Pickle Spears
- Dry your pickles thoroughly before breading for the best texture.
- Double dipping increases the crunchiness of the coating.
- Keep the oil consistently at 350°F so the coating fries quickly and stays crisp.
- Drain the finished spears on a wire rack or paper towels to prevent sogginess.
- Serve right away—nothing beats the crunch of just-fried pickles!
Creative Variations and Dipping Ideas
There are countless ways to put your own twist on fried pickle spears! Try mixing up the flavors, coatings, or sauces to suit your preferences.
Flavor Variations:
- Add cayenne to the flour for heat.
- Use smoked paprika for depth.
- Mix Parmesan cheese or ranch seasoning into the crumbs for extra flavor.
For Gluten-Free Eats:
Swap in gluten-free flour and breadcrumbs, or experiment with chickpea flour for something different.
Air Fryer Version:
Mist the breaded pickles with oil and cook in an air fryer at 400°F for 8–10 minutes, flipping halfway, for a lighter take.
Want More Crunch or Flavor?
Try spicy or bread-and-butter pickles, or blend panko with crushed cornflakes in your coating.
For fresh appetizer ideas, try out these healthy Vietnamese spring roll recipes.
Favorite Dip Pairings:
- Classic Ranch: Ranch dressing with fresh dill or chives
- Spicy Mayo: Mayo blended with sriracha or hot sauce
- Bright Yogurt Dip: Greek yogurt, lemon juice, and garlic powder
A selection of dips makes the platter extra fun to share!
Serving and Pairing Suggestions
Fried pickle spears are always a hit—perfect for sharing at parties, during the big game, or for a cozy movie night. Arrange them around a few dipping sauces and garnish with fresh herbs or lemon.
These crunchy snacks are great as a side to burgers, pulled pork, or grilled chicken. They’re also a delicious accent at barbecue cookouts or fried chicken meals.
Consider pairing them with other savory favorites like mozzarella sticks, chicken wings, or onion rings. Refreshing drinks like lemonade, iced tea, or craft beer are perfect alongside. No matter the occasion, watch these tangy spears vanish fast!
For another crowd-pleaser, learn how to make perfect homemade crab cakes.
Delve into the health benefits of pickles and get nutrition facts here (Healthline).
How to Store and Reheat Fried Pickle Spears
Once cooled, store any leftover fried pickle spears in a single layer in an airtight container, placing paper towels between layers to soak up extra moisture. They’ll keep in the fridge for up to three days.
For best results when reheating, use a preheated oven or air fryer at 400°F. Lay the spears on a wire rack above a baking sheet (or right in the air fryer basket) to ensure even crispiness—heat for 5–7 minutes, flipping halfway.
If you’re hosting, you can bread the pickles hours in advance and refrigerate. Simply fry or air fry just before serving to preserve their crisp texture.
Frequently Asked Questions
Interesting Facts About Fried Pickles:
Fried pickle spears originated in the South during the 1960s and became an Arkansas favorite before spreading to diners, fairs, and homes nationwide. They’re sometimes affectionately called “frickles” and remain a staple at sports bars, fairs, and family parties.
How to Prevent Sogginess:
Thoroughly drying pickles before breading and maintaining hot oil (around 350°F) are key to a crispy exterior. Once fried, immediate draining on a rack or paper towels ensures maximum crunch. For reheating, avoid the microwave—an oven or air fryer keeps them crisp. For more tips, check this advice on reheating fried foods (Healthline).
What You’ll Need:
Gather dill pickle spears, flour, eggs, buttermilk, breadcrumbs or cornmeal, and your preferred spices. A skillet or deep fryer, tongs or a slotted spoon, and a thermometer will help you fry successfully. Use shallow bowls for an easy breading process.
Deep-Frying Frozen Pickles:
If frying from frozen (either store-bought or homemade), heat oil to 350°F. Fry for three to five minutes, turning as needed, until crispy and heated through. Don’t overcrowd the fryer, as this keeps oil temperature steady.
Crispy fried pickle spears are always a winner, impressing family and friends with their golden crunch and zesty flavor. They’re easy to make and adapt, whether you’re experimenting with dips or seasonings. Give them a try—you’ll be surprised how quickly they disappear! Share your creative twists and let everyone enjoy this crunchy classic together.
Find even more fresh ideas and fun recipes in the breakfast and dessert collection.

